
Aug 22, 2018
Matt Jarvis
D2iQ

16 min read
One of the newest additions to the DC/OS catalog is the Percona-Server-MongoDB service. This service packages Percona-Server-MongoDB with an intuitive configuration template that makes installation and management of Percona-Server-MongoDB clusters easy for all DC/OS users. If you're not familiar with Percona-Server-MongoDB, it starts with MongoDB Community Edition - the popular free and open source, highly-scalable document database - and adds enterprise-grade features like an in-memory storage engine; hot backup functionality; database auditing and log redaction; and more...all in a free and open source package.
As with all DC/OS services, the Percona-Server-MongoDB service provides reasonable defaults for trying things out, in this case it will deploy a 3-node MongoDB replica set.
We can view all of the available configuration elements from the CLI by using :
$ dcos package describe --config percona-mongo
{
"properties": {
"admin": {
"description": "Admin task configuration properties",
"properties": {
"cpus": {
"default": 0.2,
"description": "Admin node cpu requirements",
"type": "number"
},
"init": {
"description": "Init task configuration properties. This task runs once on initiation of a new MongoDB Replica Set",
"properties": {
"initiateDelay": {
"default": "15s",
"description": "The delay before starting the ReplicaSet initialization, must end in 's' for seconds, 'm' for minutes, etc",
"type": "string"
},
"maxAddUsersTries": {
"default": 60,
"description": "The number of times to try to add database users",
"minimum": 1,
"type": "integer"
},
"maxConnectTries": {
"default": 30,
"description": "The number of times to try to connect to a database host",
"minimum": 1,
"type": "integer"
},
"maxInitReplsetTries": {
"default": 60,
"description": "The number of times to try to initiate the replica set",
"minimum": 1,
"type": "integer"
},
"retrySleep": {
"default": "3s",
"description": "The duration to wait between retries",
"type": "string"
}
},
--------
The Percona-Server-MongoDB service has a huge amount of configuration variables, so I've cut it here for brevity.
The package requires some configuration before we can install it. This is to set up the required users, passwords, and keys for security purposes. We can do this in the DC/OS UI, but I'm going to use the CLI so we need to create an options.json file and pass this to the CLI when installing the package. The file should look something like this :
{
"mongodb-credentials": {
"backupUser": "backup",
"backupPassword": "backupuserpassword",
"userAdminUser": "useradmin",
"userAdminPassword": "useradminpassword",
"clusterAdminUser": "clusteradmin",
"clusterAdminPassword": "clusteradminpassword",
"clusterMonitorUser": "clustermonitor",
"clusterMonitorPassword": "monitoruserpassword",
"key": "8cNNTVP6GqEOKzhUVDVryxIt04K6kDbXygamH4upPGAO59gzXVQAgX9NwxwqDvpt094zMkkRWDLzuCgbg3Aj8EFVEM0/W1Nz+XUSTHEn4HiNzCVG4TTHFP6P1PEPswG6tQMP6bnRXL7uGWmdGhbAxOV/+p6AfNs67MTvfCeH0EaPCgPPXhJft9D0nZ0SPOm9VvfxG3djnHClIlclkchoIwc1Kw21loyXwuOjX4RkywVDdmFXjKC+l9yxfyt/9GyhYE0OlS7ozWLiH8zy0MyzBdK+rc0fsxb2/Kb/8/2diC3O3gdVxjneQxaf66+FHVNWmV9/IHDptBHosdWkv0GboW8ZnTXnk0lyY0Jw85JFuTeFBzqPlB37jR0NU/HFm5QTLd62woaGIWCTuXGb81QHaglPZUBIhEq/b3tahJBmLc+LKd0FUShoupTtPc2FjxbHxD8dZ+L9Uv7NPtSe+o3sTD60Pnsw1wbOrNDrrC+wpwoMy2GbQjXk/d+SRK/CXfukZ676GKQDivpinhdF58l4OEi+WEN633yuNtNAQDgz+aOVZKN4oLoyR22B1nrea1qWwzZjRw7kpVxcQKiyn+gDmAZZPbctiVqTNHPE5n9LrOcctuLZKpoQk97lvZTSCKfyd32mfx9szZZ/QCfF9Dt7+G5nJUAULigKnQYRi/i86ZTPHSzfun+ZIzYLCzJuZfyS7E8DMsmv9wCPrPAF/8cOFMWW0o0Na7GZKCJ8U+AMm92R725h4g5ao6+kQPG7vOkYLR8MJzDOqcmAC0M9AwE5UXQl56V6qBNyREx/WGGYS1B5DOfZvVTJNDkoHVIL1upZgeSlACiXQ+M0Rkgo0h8BJUhGY9LTuc6S8qiMBEnhBClg4kA/u4FJ06nlmF3ZpIXTKsVSr9ee3mu0vSr6P52slvAAX+RL3y+JgSlz2kC8oVgCZZdKn7yq9e6yB3zHNMjX 8VIi/UgFmfqCiaAlUT0pt2ZzGuw1L9QUOuNAZfufSkK1ED4V"
}
}
The passwords for the users must have a minimum of 10 characters, and the key must be at least 1024 characters long, you can generate an appropriate key on MacOS using :
$ openssl rand -base64 756
Now we have our options.json we can use it to install the package :
$ dcos package install percona-mongo --options=demo.json
By Deploying, you agree to the Terms and Conditions https://d2iq.com/catalog-terms-conditions/#community-services
Default configuration requires 3 agent nodes each with: 1.0 CPU | 1024 MB MEM | 1 1000 MB Disk
Continue installing? [yes/no] yes
Installing Marathon app for package [percona-mongo] version [0.3.1-3.6.5]
Installing CLI subcommand for package [percona-mongo] version [0.3.1-3.6.5]
New command available: dcos percona-mongo
The DC/OS Mongo service is being installed.
Documentation: https://docs.mesosphere.com/service-docs/percona-mongo/
Issues: mesosphere@percona.com
We can also use package describe from the CLI to show us the available versions within the catalog :
$ dcos package describe percona-mongo --package-versions
[
"0.3.1-3.6.5",
"0.3.0-3.6.5",
"0.2.0-3.4.13",
"0.1.0-3.4.10"
]
Once our service begins to install, we can see in the DC/OS UI what elements are being deployed. As with all SDK based services, the first element that is deployed is the service scheduler. If you've read my previous post on the Kubernetes service, you'll know that DC/OS services are far from being simple package deployments. They each have their own scheduler, which is responsible for lifecycle management and operations of the deployed application.
Once the scheduler is deployed, it will begin to deploy the other elements of the application. First, we have a watchdog process. This is used to manage the MongoDB cluster itself in the event of a failure. Whilst the framework scheduler can restart things that die, distributed databases have more complex requirements to deal with failure scenarios, such as master failovers, and the watchdog handles replset "membership" by polling the DC/OS SDK API and add/removing nodes from the replset state, which would otherwise need to be done manually.
Once the watchdog is up and running, the scheduler then deploys the three members of our MongoDB replica set.
From the CLI we can dig a little deeper into what's actually happening there by using the plan command. Firstly let's look at what plans the Percona-Server-MongoDB scheduler is aware of :
$ dcos percona-mongo plan list
[
"deploy",
"recovery",
"restore-s3",
"backup-s3",
"remove-user",
"reload-system-users",
"update",
"update-user"
]
And since we've just completed our deployment, let's look at the steps that the scheduler used to deploy this particular configuration :
$ dcos percona-mongo plan status deploy
deploy (serial strategy) (COMPLETE)
├─ watchdog (serial strategy) (COMPLETE)
│ └─ admin-0:[watchdog] (COMPLETE)
└─ replicaset (parallel strategy) (COMPLETE)
├─ mongo-rs-0:[mongod] (COMPLETE)
├─ mongo-rs-0:[init] (COMPLETE)
├─ mongo-rs-1:[mongod] (COMPLETE)
└─ mongo-rs-2:[mongod] (COMPLETE)
Using the plan command, we can also perform operations on particular running plans, such as pausing and resuming, to see the full list of options you can use :
$ dcos percona-mongo plan --help
As part of the installation, the service has also installed the Percona-Server-MongoDB CLI extension, so let's go ahead and use that to find the deployed endpoints for our MongoDB replica set.
$ dcos percona-mongo endpoints
[
"mongo-port"
]
$ dcos percona-mongo endpoints mongo-port
{
"address": [
"10.0.0.23:27017",
"10.0.2.63:27017",
"10.0.0.130:27017"
],
"dns": [
"mongo-rs-0-mongod.percona-mongo.autoip.dcos.thisdcos.directory:27017",
"mongo-rs-1-mongod.percona-mongo.autoip.dcos.thisdcos.directory:27017",
"mongo-rs-2-mongod.percona-mongo.autoip.dcos.thisdcos.directory:27017"
]
}
So we can see from this output the IP and ports for each of our MongoDB instances, and the DNS names that have been assigned for each of them. We can now use that to connect to our cluster.
Those endpoints are only accessible inside your cluster, although we could configure external access by using a proxy, but for now let's connect from inside the cluster. The easiest way to do this is to get a shell directly on one of our MongoDB containers, from where we can run mongoshell.
First we'll need the Mesos task ID's for our Mongo instances :
$ dcos task
NAME HOST USER STATE ID MESOS ID REGION ZONE
mongo-rs-0-mongod 10.0.0.23 root R mongo-rs-0-mongod__2d653433-6f70-4141-9bce-0afa190f1e90 a2811387-4a3e-40f6-a152-1c633eedcc45-S5 --- ---
mongo-rs-1-mongod 10.0.2.63 root R mongo-rs-1-mongod__dc51c08a-ab1d-4878-910b-cc3ddaa4e455 a2811387-4a3e-40f6-a152-1c633eedcc45-S2 --- ---
mongo-rs-2-mongod 10.0.0.130 root R mongo-rs-2-mongod__40ad6a0e-9c29-417b-a8f5-e9062a7fa04b a2811387-4a3e-40f6-a152-1c633eedcc45-S0 --- ---
percona-mongo 10.0.3.197 root R percona-mongo.78e63e04-7936-11e8-9b86-ce58ec43e21b a2811387-4a3e-40f6-a152-1c633eedcc45-S4 --- ---
watchdog-0-watchdog 10.0.3.125 root R watchdog-0-watchdog__1bbaf0df-a194-4af6-a374-56938ec9f80e a2811387-4a3e-40f6-a152-1c633eedcc45-S3 --- ---
Once we have our task ID's we can use one of them to launch a shell on the container :
$ dcos task exec --interactive --tty mongo-rs-0-mongod__2d653433-6f70-4141-9bce-0afa190f1e90 /bin/bash
root@ip-10-0-0-23:/mnt/mesos/sandbox#
We can now run the mongo shell and connect to our MongoDB replica set :
root@ip-10-0-0-23:/mnt/mesos/sandbox# mongo mongodb://useradmin:useradminpassword@mongo-rs-0-mongod.percona-mongo.autoip.dcos.thisdcos.directory,mongo-rs-1-mongod.percona-mongo.autoip.dcos.thisdcos.directory,mongo-rs-2-mongod.percona-mongo.autoip.dcos.thisdcos.directory:27017/admin?replicaSet=rs
Percona Server for MongoDB shell version v3.4.13-2.11
connecting to: mongodb://useradmin:useradminpassword@mongo-rs-0-mongod.percona-mongo.autoip.dcos.thisdcos.directory,mongo-rs-1-mongod.percona-mongo.autoip.dcos.thisdcos.directory,mongo-rs-2-mongod.percona-mongo.autoip.dcos.thisdcos.directory:27017/admin?replicaSet=rs
2018-06-26T13:30:32.738+0000 I NETWORK [thread1] Starting new replica set monitor for rs/mongo-rs-0-mongod.percona-mongo.autoip.dcos.thisdcos.directory:27017,mongo-rs-1-mongod.percona-mongo.autoip.dcos.thisdcos.directory:27017,mongo-rs-2-mongod.percona-mongo.autoip.dcos.thisdcos.directory:27017
2018-06-26T13:30:32.753+0000 I NETWORK [ReplicaSetMonitor-TaskExecutor-0] Successfully connected to mongo-rs-2-mongod.percona-mongo.autoip.dcos.thisdcos.directory:27017 (1 connections now open to mongo-rs-2-mongod.percona-mongo.autoip.dcos.thisdcos.directory:27017 with a 5 second timeout)
2018-06-26T13:30:32.753+0000 I NETWORK [thread1] Successfully connected to mongo-rs-1-mongod.percona-mongo.autoip.dcos.thisdcos.directory:27017 (1 connections now open to mongo-rs-1-mongod.percona-mongo.autoip.dcos.thisdcos.directory:27017 with a 5 second timeout)
2018-06-26T13:30:32.767+0000 I NETWORK [ReplicaSetMonitor-TaskExecutor-0] Successfully connected to mongo-rs-0-mongod.percona-mongo.autoip.dcos.thisdcos.directory:27017 (1 connections now open to mongo-rs-0-mongod.percona-mongo.autoip.dcos.thisdcos.directory:27017 with a 5 second timeout)
Percona Server for MongoDB server version: v3.4.13-2.11
Welcome to the Percona Server for MongoDB shell.
For interactive help, type "help".
For more comprehensive documentation, see
https://www.percona.com/doc/percona-server-for-mongodb
Questions? Try the support group
https://www.percona.com/forums/questions-discussions/percona-server-for-mongodb
2018-06-26T13:30:32.770+0000 I STORAGE [main] In File::open(), ::open for '' failed with No such file or directory
rs:PRIMARY>
You will also note the username and password I've used to connect, this will depend on the initial configuration you supplied to the package during install.
Once I have the mongo shell running I can execute some commands :
rs:PRIMARY> show dbs;
admin 0.000GB
local 0.001GB
rs:PRIMARY> show users;
{
"_id" : "admin.backup",
"user" : "backup",
"db" : "admin",
"roles" : [
{
"role" : "backup",
"db" : "admin"
},
{
"role" : "clusterMonitor",
"db" : "admin"
}
]
}
{
"_id" : "admin.clusteradmin",
"user" : "clusteradmin",
"db" : "admin",
"roles" : [
{
"role" : "clusterAdmin",
"db" : "admin"
}
]
}
{
"_id" : "admin.clustermonitor",
"user" : "clustermonitor",
"db" : "admin",
"roles" : [
{
"role" : "clusterMonitor",
"db" : "admin"
}
]
}
{
"_id" : "admin.useradmin",
"user" : "useradmin",
"db" : "admin",
"roles" : [
{
"role" : "userAdminAnyDatabase",
"db" : "admin"
}
]
}
In the second command you can see the initial users which are created as part of the deployment. Usernames and passwords for these users are configured by using a custom JSON file as we saw earlier.
Best practice when using mongoDB is to create users for each application, with limited permissions only on the data they need to read or write. Using the mongo shell we can create a user for a test database :
rs:PRIMARY> use test;
switched to db test
rs:PRIMARY> db.createUser({.
.. user: "test",.
.. pwd: "123456",.
.. roles: [.
.. { db: "test", role: "readWrite" }.
.. ].
.. });
Successfully added user: {
"user" : "test",
"roles" : [
{
"db" : "test",
"role" : "readWrite"
}
]
}
rs:PRIMARY> show users;
{
"_id" : "test.test",
"user" : "test",
"db" : "test",
"roles" : [
{
"role" : "readWrite",
"db" : "test"
}
]
}
However, we can also do this from the DC/OS CLI, using the Percona-Mongo CLI extension, allowing us to perform this common administrative function without having to connect in to the cluster directly :
Firstly we need to create a JSON file defining the user we want to create :
$ cat testuser.json
{
"user": "matt",
"pwd": "123456",
"roles": [
{ "db": "test", "role": "readWrite" }
]
}
Now we pass that to the CLI, along with the name of the database, and the credentials for our admin user with user administration permissions :
$ dcos percona-mongo user add test testuser.json
{
"message": "Received cmd: start update-user with parameters: {MONGODB_CHANGE_USER_DB=test, MONGODB_CHANGE_USER_DATA=eyJ1c2VycyI6W3sidXNlciI6Im1hdHQiLCJwd2QiOiIxMjM0NTYiLCJyb2xlcyI6W3sicm9sZSI6InJlYWRXcml0ZSIsImRiIjoidGVzdCJ9XX1dfQ==}"
}
And when we check from the mongo shell, we can see that user has been created :
rs:PRIMARY> show users;
{
"_id" : "test.matt",
"user" : "matt",
"db" : "test",
"roles" : [
{
"role" : "readWrite",
"db" : "test"
}
]
}
{
"_id" : "test.test",
"user" : "test",
"db" : "test",
"roles" : [
{
"role" : "readWrite",
"db" : "test"
}
]
}
We can use the DC/OS CLI extension to create, update and delete users, and we also have control over the process itself, with CLI commands to stop any user changes which have been previously started.
Let's take a look at some of the other features of the service. Scaling up our MongoDB cluster would be a complicated process if we were installing this manually, but the Percona-Server-MongoDB framework makes this really easy. We still want to maintain an odd number in our replica set in order to avoid a split brain scenario ( see https://docs.mongodb.com/manual/core/replica-set-architectures/ for more details ), and the package enforces that, so let's increase our replica set from 3 to 5.
There are a few different ways we can do this but let's look at this from the UI first. If we click on the Edit button, we'll find ourselves in the config editor.
To scale up our replica set, we'll change the count field from 3 to 5, and then hit Review and Run.
Again we'll have the opportunity to edit or download our config, or to apply it we just click on the Run Service button in the top right.
When we click back on the Services tab, we'll be able to see those changes start to happen, with our two additional nodes starting to deploy.
After a while, all of our new processes will become healthy, and the process will be completed!
The CLI extension also gives us an even easier way of scaling our replica set :
$ dcos percona-mongo scale up 5
Pod task count for 'percona-mongo' is currently 3
Updating service configuration for 'percona-mongo'
Pod task count for 'percona-mongo' is updated to 5
The scale command allows us to scale up and down, with the options of 1,3,5 or 7 nodes. To see what our cluster scale currently is, we can just run :
$ dcos percona-mongo scale list
Pod task count for 'percona-mongo' is currently 5
It's worth noting for production environments that scaling up will create a performance impact on your elected Primary, since the Primary has to sync data to the new node.
So what if we want to scale our cluster vertically instead, adding more CPU or RAM to the individual nodes ? Well here again the framework can do this for us very easily. Navigate back to the Configuration tab, edit the configuration and change our CPU count to 2 per node.
As before, lets click Review and Run, and then click Run Service. Now when we switch back to the Services tab, we'll firstly see the scheduler restart, and then each of our nodes restart with the new configuration. This is done in order, avoiding any downtime for our replica set.
From an operational perspective, the Percona-Server-MongoDB service also offers us integration with the DC/OS metrics API, providing MongoDB metrics directly into DC/OS. Firstly, we need to enable the integration :
Once we've deployed the new configuration, we can now use the metrics API to view MongoDB metrics, and integrate them into our wider metrics strategy. To do this from the CLI, first find the task ID of one of the MongoDB replicas :
$ dcos task
NAME HOST USER STATE ID MESOS ID REGION ZONE
admin-0-watchdog 10.0.1.247 root R admin-0-watchdog__c47def49-b205-4836-870f-32add3914077 207783f7-10cf-44ab-9966-9bb1d6f3b797-S4 --- ---
mongo-rs-0-mongod 10.0.2.202 root R mongo-rs-0-mongod__a11a63ee-9f1c-4bad-a431-5dedd8375005 207783f7-10cf-44ab-9966-9bb1d6f3b797-S8 --- ---
mongo-rs-1-mongod 10.0.2.168 root R mongo-rs-1-mongod__525587c3-cf8d-4fb5-afa3-33ae599ae452 207783f7-10cf-44ab-9966-9bb1d6f3b797-S5 --- ---
mongo-rs-2-mongod 10.0.0.241 root R mongo-rs-2-mongod__e69e01df-6895-436f-9f9d-f69b4a83afc4 207783f7-10cf-44ab-9966-9bb1d6f3b797-S3 --- ---
percona-mongo 10.0.2.184 root R percona-mongo.81e78f14-84ea-11e8-9832-a63d4d1f1cb3 207783f7-10cf-44ab-9966-9bb1d6f3b797-S7 --- ---
Once we have our task ID, we can use the CLI to view the incoming metrics :
$ dcos task metrics details mongo-rs-0-mongod__a11a63ee-9f1c-4bad-a431-5dedd8375005
NAME VALUE .
ip-10-0-2-202_eu-west-1_compute_internal.extra.is_secondary 0 .
ip-10-0-2-202_eu-west-1_compute_internal.global_lock.active_total 0 .
ip-10-0-2-202_eu-west-1_compute_internal.connections.current 8 .
ip-10-0-2-202_eu-west-1_compute_internal.mem.mapped_with_journal 0 .
ip-10-0-2-202_eu-west-1_compute_internal.metrics.commands.saslStart.total 4 .
ip-10-0-2-202_eu-west-1_compute_internal.metrics.cursor.timedout 0 .
ip-10-0-2-202_eu-west-1_compute_internal.metrics.operation.scanAndOrder 0 .
ip-10-0-2-202_eu-west-1_compute_internal.ops.deletes 0 .
ip-10-0-2-202_eu-west-1_compute_internal.global_lock.total_time 0 .
ip-10-0-2-202_eu-west-1_compute_internal.ops.commands 79 .
ip-10-0-2-202_eu-west-1_compute_internal.metrics.commands.ping.total 8 .
ip-10-0-2-202_eu-west-1_compute_internal.global_lock.lock_time 0 .
ip-10-0-2-202_eu-west-1_compute_internal.metrics.cursor.open-pinned 0 .
ip-10-0-2-202_eu-west-1_compute_internal.global_lock.queued_writers 0 .
ip-10-0-2-202_eu-west-1_compute_internal.ops.updates 0 .
ip-10-0-2-202_eu-west-1_compute_internal.extra.heap_usage 0 .
ip-10-0-2-202_eu-west-1_compute_internal.extra.is_master 0 .
ip-10-0-2-202_eu-west-1_compute_internal.metrics.commands.replSetHeartbeat.failed 0 .
ip-10-0-2-202_eu-west-1_compute_internal.metrics.commands.getnonce.failed 0 .
ip-10-0-2-202_eu-west-1_compute_internal.connections.available 51192 .
ip-10-0-2-202_eu-west-1_compute_internal.metrics.operation.writeConflicts 0 .
ip-10-0-2-202_eu-west-1_compute_internal.metrics.commands.ping.failed 0 .
ip-10-0-2-202_eu-west-1_compute_internal.metrics.commands.replSetHeartbeat.total 37 .
ip-10-0-2-202_eu-west-1_compute_internal.connections.created 0 .
ip-10-0-2-202_eu-west-1_compute_internal.metrics.commands.serverStatus.failed 0 .
ip-10-0-2-202_eu-west-1_compute_internal.metrics.commands.saslContinue.failed 0 .
ip-10-0-2-202_eu-west-1_compute_internal.global_lock.active_writers 0 .
ip-10-0-2-202_eu-west-1_compute_internal.metrics.document.deleted 0 .
ip-10-0-2-202_eu-west-1_compute_internal.metrics.commands.saslContinue.total 8 .
ip-10-0-2-202_eu-west-1_compute_internal.extra.page_faults 0 .
ip-10-0-2-202_eu-west-1_compute_internal.metrics.commands.isMaster.total 11 .
ip-10-0-2-202_eu-west-1_compute_internal.global_lock.active_readers 0 .
ip-10-0-2-202_eu-west-1_compute_internal.global_lock.queued_readers 0 .
ip-10-0-2-202_eu-west-1_compute_internal.mem.virtual 1381 .
ip-10-0-2-202_eu-west-1_compute_internal.global_lock.queued_total 0 .
ip-10-0-2-202_eu-west-1_compute_internal.metrics.commands.saslStart.failed 0 .
ip-10-0-2-202_eu-west-1_compute_internal.mem.mapped 0 .
ip-10-0-2-202_eu-west-1_compute_internal.ops.getmores 0 .
ip-10-0-2-202_eu-west-1_compute_internal.metrics.cursor.open-total 0 .
ip-10-0-2-202_eu-west-1_compute_internal.metrics.commands.getnonce.total 9 .
ip-10-0-2-202_eu-west-1_compute_internal.metrics.document.returned 0 .
ip-10-0-2-202_eu-west-1_compute_internal.ops.queries 1 .
ip-10-0-2-202_eu-west-1_compute_internal.metrics.commands.serverStatus.total 2 .
ip-10-0-2-202_eu-west-1_compute_internal.metrics.document.inserted 0 .
ip-10-0-2-202_eu-west-1_compute_internal.mem.resident 75 .
ip-10-0-2-202_eu-west-1_compute_internal.metrics.cursor.open-noTimeout 0 .
ip-10-0-2-202_eu-west-1_compute_internal.ops.inserts 0 .
ip-10-0-2-202_eu-west-1_compute_internal.metrics.document.updated 0 .
ip-10-0-2-202_eu-west-1_compute_internal.metrics.commands.isMaster.failed 0
The service also supports full audit logging capabilities, which gives us detailed information on the administration activities of our deployment. In order to enable this, once again we configure via the UI :
With audit logging turned on, an audit log file is created in the mongo-data directory of each container. This can be accessed via the DC/OS UI, or from the CLI :
First, let's get the task ID of one of our MongoDB instances :
$ dcos task
NAME HOST USER STATE ID MESOS ID REGION ZONE
mongo-rs-0-mongod 10.0.0.200 root R mongo-rs-0-mongod__8cc96dff-2d30-4dee-9e78-6f60f326bf70 0f38f231-1301-4b3e-8b69-b7b7b099ec26-S2 --- ---
mongo-rs-1-mongod 10.0.1.101 root R mongo-rs-1-mongod__b8d42807-d740-4b98-b5f5-b7f3212e8030 0f38f231-1301-4b3e-8b69-b7b7b099ec26-S1 --- ---
mongo-rs-2-mongod 10.0.3.191 root R mongo-rs-2-mongod__11da7a4b-c4c7-4c59-b07f-168ba347138f 0f38f231-1301-4b3e-8b69-b7b7b099ec26-S0 --- ---
percona-mongo 10.0.0.200 root R percona-mongo.9f47c650-7df9-11e8-ab4d-8a4ebd13be9e 0f38f231-1301-4b3e-8b69-b7b7b099ec26-S2 --- ---
pmm-server 10.0.2.62 root R pmm-server.8d30c8fd-7de4-11e8-ab4d-8a4ebd13be9e 0f38f231-1301-4b3e-8b69-b7b7b099ec26-S3 --- ---
watchdog-0-watchdog 10.0.3.13 root R watchdog-0-watchdog__7f400405-27f8-4571-b746-f6ba08aa8417 0f38f231-1301-4b3e-8b69-b7b7b099ec26-S4 --- ---
Now we can use dcos task exec to get a shell on the container :
$ dcos task exec --tty --interactive mongo-rs-0-mongod__8cc96dff-2d30-4dee-9e78-6f60f326bf70 /bin/bash
From here, we now need to navigate to the mongo-data folder, and then use bsondump to view the contents of the audit log :
root@ip-10-0-0-200:/mnt/mesos/sandbox# ls
bootstrap config-templates executor mongo-data mongod.key mongodb-executor-linux mongodb-initiator-linux mongodb-watchdog-linux stderr.logrotate.conf stdout.logrotate.conf
bootstrap.zip containers executor.zip mongod.conf mongodb-controller-linux mongodb-healthcheck-linux mongodb-tools.zip stderr stdout tmp
root@ip-10-0-0-200:/mnt/mesos/sandbox# cd mongo-data
root@ip-10-0-0-200:/mnt/mesos/sandbox/mongo-data# bsondump auditLog.bson
{"atype":"createDatabase","ts":{"$date":"2018-07-02T13:14:11.925Z"},"local":{"ip":"10.0.0.200","port":27017},"remote":{},"users":[],"roles":[],"param":{"ns":"local"},"result":0}
{"atype":"createCollection","ts":{"$date":"2018-07-02T13:14:11.929Z"},"local":{"ip":"10.0.0.200","port":27017},"remote":{},"users":[],"roles":[],"param":{"ns":"local.startup_log"},"result":0}
{"atype":"createCollection","ts":{"$date":"2018-07-02T13:14:11.942Z"},"local":{"ip":"10.0.0.200","port":27017},"remote":{},"users":[{"user":"__system","db":"local"}],"roles":[],"param":{"ns":"local.me"},"result":0}
{"atype":"authCheck","ts":{"$date":"2018-07-02T13:14:13.071Z"},"local":{"ip":"10.0.0.200","port":27017},"remote":{"ip":"127.0.0.1","port":52090},"users":[],"roles":[],"param":{"command":"replSetGetConfig","ns":"admin","args":{"replSetGetConfig":1}},"result":13}
One of the other great functions of the Percona-Sever-MongoDB service is the ability to take a backup of the database. This currently supports pushing the backup to an AWS S3 bucket.
There are a variety of configuration options, including the ability to use a dedicated backup secondary, which means the load of taking the backup isn't interfering with the operation of your live replica set.
All of this configuration is available from the UI :
We can also use the CLI extension to access this functionality :
$ dcos percona-mongo backup run s3 --access-key=youraccesskey --secret-key=yoursecretkey --bucket-prefix=/mongobackups --bucket-name=mattj-mongotest --region=eu-west-1
{
"message": "Received cmd: start backup-s3 with parameters: {BACKUP_RESTORE_S3_ACCESS_KEY=youraccesskey, BACKUP_RESTORE_S3_SECRET_KEY=yoursecretkey, BACKUP_RESTORE_S3_REGION=eu-west-1, BACKUP_UPLOAD_S3_BUCKET_NAME=mattj-mongotest, BACKUP_UPLOAD_S3_BUCKET_PREFIX=/mongobackups}"
}
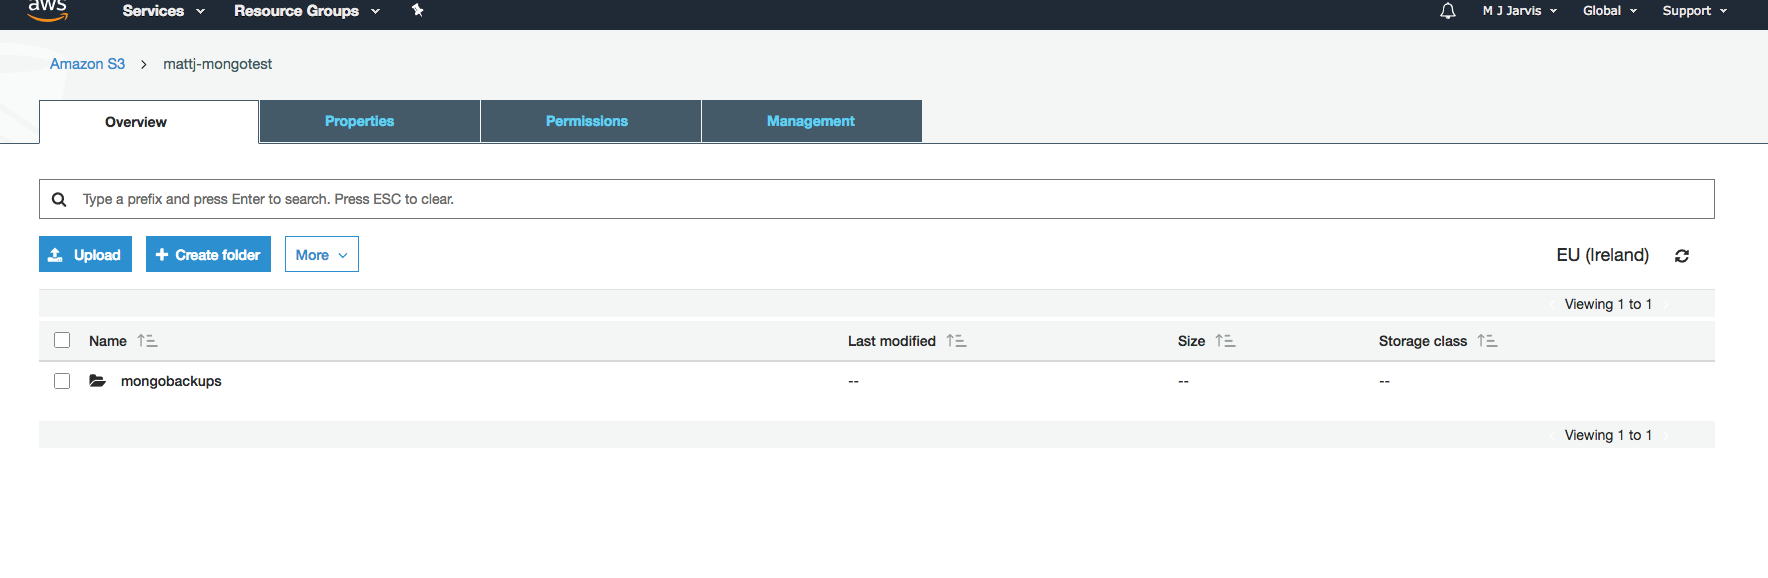
When the backup starts, we'll see the backup process, mongodb_consistent_backup, starting :
Now the backup process has completed, we can see our backup created in the S3 bucket :
We can also restore backups directly from the CLI :
$ dcos percona-mongo restore run s3 --access-key=youraccesskey --secret-key=yoursecretkey s3://mattj-mongotest/mongobackups/percona-mongo/20180803_1038/rs/dump
{
"message": "Received cmd: start restore-s3 with parameters: {RESTORE_S3_URL=s3://mattj-mongotest/mongobackups/percona-mongo/20180803_1038, BACKUP_RESTORE_S3_ACCESS_KEY=youraccesskey, BACKUP_RESTORE_S3_SECRET_KEY=yoursecretkey}"
}
It's important to note here that you need to use the S3 URL for the dump folder for the specific replica set you are using.
So I hope you can see from this blog that the Percona-Server-MongoDB framework provides a great set of functionality for easily deploying and managing MongoDB. Having had to do this manually in the past myself, I can really see the operational benefits that this level of automation provides. The Percona-Server-MongoDB service is under ongoing development, with lots of great new features planned, so it will be great to see this service continue to improve.